
At Christmas my family have a tradition. Christmas Eve, we all get together, exchange presents from us kids (there’re three of us, all plus partners) and watch a film together. It’s probably the part of Christmas I look forward to the most. Christmas just gone, we watched ‘The Great and Powerful Oz’. It was ok, but mainly I like it because it inspired this weeks pattern, of a character who is on screen for no more than a couple of minutes – the River Fairy.

Original design at link below the photo. Credit to Michael Kutsche.
Make you own with the free pattern after the jump. Intermediate pattern – and the first time I’ve incorporated Double Crochet and Triple crochet into a pattern!
The Essentials
Hook: 3.5mm (E)
Yarn: DK in grey, peach and gold.
Also Needed: 6mm safety eyes; pink and white (optionally dark grey) embroidery thread; pipe cleaners.
Finished size: Approx 7 inches tall.
Terms (US):
CH = Chain
Sc = Single Crochet
Dc = Double Crochet
Tc = Triple Crochet
Sl st = slip Stitch
INC = Increase
DEC = Decrease
Head
Magic ring in grey
Round 1: 6sc into centre of magic ring [6]
Round 2: INC around [12]
Round 3: {1sc, INC} repeat around [18]
Round 4: {2sc, INC} repeat around [24]
Round 5: {3sc, INC} repeat around [30]
Round 6: {4sc, INC} repeat around [36]
Round 7: {5sc, INC} repeat around [42]
Round 8-10: Sc around [42]
Round 11: {5sc, DEC} repeat around [36]
Round 12: {4sc, DEC} repeat around [30]
Round 13: {3sc, DEC} repeat around [24]
Round 14: {2sc, DEC} repeat around [18]
Round 15: {1sc, DEC} repeat around [12]
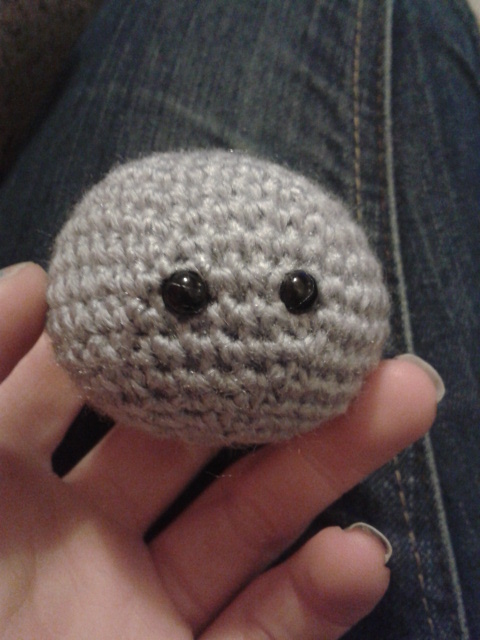
Add safety eyes (I used 6mm, although 8mm might be better).
Stuff
Round 16: DEC around [6]
Finish off and weave in tail.
Body
Magic ring in grey
Round 1: 6sc into centre of magic ring [6]
Round 2: INC around [12]
Round 3: {1sc, INC} repeat around [18]
Round 4: {2sc, INC} repeat around [24]
Round 5: {3sc, INC} repeat around [30]
Round 6-7: Sc around [30]
Round 8: {3sc, DEC} repeat around [24]
Round 9: Sc around [24]
Round 10: {2sc, DEC} repeat around [18]
Round 11-12: Sc around [18]
Round 13: {1sc, DEC} repeat around [12]
Stuff
Round 14: DEC around [6]
Round 15: Sc around [6]
Finish off leaving long tail for sewing. Sew head to body.


Arm (make 2)
Magic ring in grey
Round 1: 6sc into centre of magic ring [6]
Round 2: {Sc, INC} around [9]
Round 3: Sc around [9]
Round 4: {Sc, DEC} around [6]
Round 5-16: Sc around [6]
Finish off leaving long tail for sewing.

To attach, thread a pipe cleaner through the body, just under the neck (the last two rounds of 6sc). Stuff one arm with one end of the pipe cleaner and sew to body. Measure second arm against the remaining pipe cleaner and cut to size. Thread on the arm and sew in place. Bend at the end (hand).


Leg (make 2)
Magic ring in grey
Round 1: 6sc into centre of magic ring [6]
Round 2: {Sc, INC} around [9]
Round 3-4: Sc around [9]
Round 5: {Sc, DEC} around [6]
Round 6-11: Sc around [6]
Round 12: {Sc, INC} around [9]
Round 13: {Sc, DEC} around [6]
Round 13-16: Sc around [6]
Finish off leaving long tail for sewing.

To attach, thread a pipe cleaner through the bottom body, either side of the magic ring. Stuff one leg with one end of the pipe cleaner and sew to body. Measure second leg against the remaining pipe cleaner and cut to size. Thread on the leg and sew in place. Bend the end (foot) and at Row 12 (knee).


Tail
Magic ring in grey
Round 1: 6sc into centre of magic ring [6]
Round 2-21: Sc around [6]
Finish off leaving long tail for sewing. Stuff with a pipe cleaner and sew in place on the bum.

Sorry no photo of attaching the tail in place! It’s pretty self explanatory though.
Ears (make 2)
Ch7 In peach
Row 1: 6sc ch3 and turn
Row 2: 8sc ch1 and turn
Row 3: 7sc ch2 and turn
Row 4: 8sc ch1 and turn
Row 5: 8sc ch5 and turn
Row 6: 12sc
Finish off and pinch the flat side together.


Hold with a stitch. Sew to head using grey yarn.


Arm fins (make 2)
Ch12 in peach
Row 1: sl st, sc, sl st, {dc ch2}, sl st, {tc ch3}, sl st, {dc ch2}, sl st, sc, sl st
Note: Stitches following instructions in {…} should be done in the very next stitch – don’t skip stitches along the chain. This gives the waved appearance.
Finish off leaving a long tail for sewing. Sew along the top of the arms, as if over the elbow.


Tail fins (make 2)
Ch18 in gold
Row 1: sl st, {sc ch1}, sl st, {sc, ch1}, sl st, {sc ch1}, sl st, {sc ch1}, sl st, {dc ch2}, sl st, {tc, ch3}, sl st, {dc, ch2}, sl st, sc, sl st
Note: Stitches following instructions in {…} should be done in the very next stitch – don’t skip stitches along the chain. This gives the waved appearance.
Finish off leaving a long tail for sewing. Sew the last lump of both fins together. Sew the sewn together point to the end of the tail, then sew each fin down along the length of the tail.

^ Sew this end together.

Head Fin
Ch7 in gold
Row 1: 6sc ch3 and turn
Row 2: 8sc ch1 and turn
Row 3: 7sc ch2 and turn
Row 4: 8sc ch1 and turn
Row 5: 7sc ch2 and turn
Row 6: 8sc ch1 and turn
Row 7: 8sc ch5 and turn
Row 8: 12sc ch1 and turn
Row 9: 12 sl st
Finish off and weave tail back to the end. Fold the lower corner up to form a triangle. Sew in place. Sew find to head, Row 9 (12 sl st) facing down (it should have curved for easy sewing).

Fold up this bottom corner ^


Wings
Ch41 in gold
Row 1: 40sc ch1 and turn
Row 2: 40sc ch1 and turn
Row 3: 3 sl st, 34sc ch1 and turn
Row 4: 34sc ch1 and turn
Row 5: 3 sl st, 28sc ch1 and turn
Row 6: 28sc ch1 and turn
Row 7: 3 sl st, 22sc ch1 and turn
Row 8: 22sc ch7 and turn
Row 9: 28sc ch7 and turn
Row 10: 34sc ch1 and turn
Row 11: 16sc, 2 sl st, 16sc.
Finish off and weave in the tails.
Gather the wings in middle (easily located by the sl st’s in Row 11). Sew to the back of the River Fairy.


Finishing Details (mouth, fingers, toes)
Back stitch a smile in pink embroidery thread, and add double stitches of teeth (I went for six, but it’s whatever you fancy really).

In white or darker grey (black is too stark), embroider two stitches in each hand and each foot to form fingers and toes.

Hand

Feet
And you’re finished!
Original design at link below the photo. Credit to Michael Kutsche.

Reblogged this on UK Crochet Patterns.
Gorgeous, absolutely stunning!
Aww thank you 😀 x
This is an amazing pic of work. I appreciate you showing how you did the pipe cleaners. I gives me a few ideeas on how to improve my work.
I’m a convert to pipe cleaners recently, they’re brilliant for limbs. It was only since my friend over at Mad Crochet Lab recommeded them to me that I even considered them 🙂 x
This is the best crochet critter ever!
I’m blushing 🙂 x
Beautiful Beautiful! Thanks for making this pattern for free. This creature is awesome ❤
Aww thanks Jen – free is the name of the game here at Amiguruthi (until I have time to sit down and play with paid patterns. But I wouldn’t worry about that happening any time soon lol) x
Hey thanks for the mention! This creature will be pimped out at TMH sometime in the next few days! I’m glad you gave pipe cleaners a try! They really are wonderful for small amis like this and bonus – you can get a whole ton (slight exaggeration) for very little money! 🙂
Credit where it’s due Mad – I’d never have considered it otherwise 😀 It’s such a good idea too – much easier than stuffing thin tubes and posable!
Thanks for the pimpage 😀 x
Good designs deserve exposure! 😀
You’re very skilled and very original, girl. Keep on crocheting! I like what you do 🙂
Aww thank you honey – I’ll try not to disappoint! 😀 x
This is a brilliant make and it looks so like the original.
Thank you! I’m glad people are seeing the similarities – I get creation blindness and stop being so sure anymore lol x
Pingback: Nehir Perisi
Pingback: Ami-Me (Free Pattern and edit shots) | Amiguruthi
Thanks a million for your gracious and generous gift of this wonderful pattern. It’s unique and truly beautiful in it’s simplicity. I’m always on the lookout for something unique and I will be making it for my doll swap this year at Handmadedollsandfriends.
Aww lovely to hear – hope it goes to someone who will love it 🙂 x